FOLLOW This Blog!

Tuesday, July 31, 2018

An Acrostic Poem For our Missed Loved One!


I am at the Gulf house today trying to sort, purge, and pack for the next chapter in our life! As I was sorting through some notebooks of poems and doodles, I came across this Acrostic Poem I had written for my youngest son's friend who unexpectedly and tragically passed from our world - much too soon! 

Little William was one of those friends who was at our home so often, going to football games with our family, spending nights and weekends with us; he would show up just in time for dinner almost every day; and the day before he died, I had joked with him that if he spent any more time at our house, I was going to have to charge his daddy child support. He looked at me with his tilted head and crooked little smile and laughed at me. It was a smile and a laugh that put sunshine in hearts!

William and my son were true and wonderful childhood best friends. William played baseball, my son played football; they were at one another's games with celebrations of won games, picking one another up after a lost game. They were often running the country roads as boys will do: fishing, catching snakes to bring home and scare the bejeezus out of me with, climbing trees, hanging out at the local river rope swing; it seemed they would always be inseparable. They should have grown up together, sharing all the milestones kids experience: first dates, first kisses, getting their driver's license, senior skip day, and maybe a broken heart or two before settling into adulthood.


As our family settled in the first night after hearing the news, I sat alone in the kitchen trying to find strength. I had gotten a deep urge to write and it didn't take long to pen these words:

William Be Our Angel and Fly!


When God gave you life,
It was His plan to take you home.
Let me not ask why, 
Lest you be the child who has gone.
I cry in my strife,
And yet I know you're not alone.
May your soul soar high!


Be our angel and fly!


© 2007 Michelle LaDuke

 *****

May you forever be resting in peace our fun and adorable little friend! Thanks for making me smile today!


Monday, July 23, 2018

Preserving pine needles for basketry


I love the outdoors and all it has to offer. I love going on leisurely walks, collecting seeds, pinecones, and leaves; so, when I want to unwind and also be productive, I collect pine needles for selling. I could sell them as is, off the ground or off a fallen tree, but I like to clean and preserve them. This way, the pine needles are ready for whatever project awaits them!
*****

The first thing I do once I've collected a good amount of pine needles, is to wash them. I like to get as much dirt and pine sap off as possible. I wash them in warm to hot water with a simple dish detergent. I usually use Dawn Dish Detergent.
This is approximately 1 pound of needles.

I completely immerse the pine needles in the soapy water. 

I like to get the pine needles nice and clean, so I actually wash them with a wash cloth. I pick a few up at a time by the sheath end, and gently wipe them to the tips. 

The water gets fairly dirty, so I usually start with clean water for each batch of pine needles.

After I wash them, I rinse the pine needles well, making sure to get all the soap off. Most times it takes two rinses before putting them out to dry. You can see even after they've been washed and rinsed well, there is still a small amount of dirt and particles in the rinse water. 


I spread the pine needles out on a towel to dry. I don't put them back out in the sun, because that tends to make them brittle, and they begin to twist.

During our rainy season, we get these naturally mottled pine needles. I think these are beautiful; so I was going out after each little afternoon storm, or windy period to get as many of them as I could.

I know that mottled foliage usually means there's a plant/tree illness or disease; but once these they are washed and dried, we get these stunning preserved needles!

The Rhythm of the Dream Weaver

I have several self-therapeutic methods that I turn to when I need to reign in my topsy-turvy whirlwind of thoughts and anxieties. One of my tried and true methods is to write. It can be simple journaling, poetry, or a chapter or two in whatever book I'm working on; and sometimes it looks like plain old gibberish. Today it is a poem; a sonnet. Sonnets are my favorite! 

*****

The Rhythm of the Dream Weaver


The weaver strums chords of hope with his sandman fingers, 
Waltzing his way through her repeated dreams.
The music takes her mind from the madness that lingers,
As she shuffles her way through a madman's schemes.

The Maestro's resounding harmonies join to lead her,
In wake or sleep, or between the two states.
He strums and he hums 'til he creates a believer
In the melody, chorus, and rhythm of fate.

She sways to the melody that echoes the spirit,
Residing within the walls of her mind.
Intertwining their chorus of rhythm and lyrics, 
With a choreographed dance she can mime.

She sings and she dances, and is no longer afraid
Of rattling bones in closets, and the choices they've made!

© Michelle LaDuke 2018


*****

If you enjoyed this sonnet, I hope you'll read 
The Weeping Tree

*****

Until next time!
May your blessings be many and your troubles be few!

Tuesday, July 17, 2018

Foil packet potatoes and onions


These potatoes make a great side dish to compliment any bar-b-que!
*****
I cut six small potatoes and 1 small onion into cubes. You can slice them or cut them however you like! Add salt, pepper, and garlic powder to taste. I like to keep it light on the seasonings as not to overpower the main dish, but you can have fun and play around with your spices and seasonings.

 I stirred in 2 tbsp. Bertolli Olive Oil to lightly coat the potatoes.
Put on foil and wrap tightly.


*****

Put on foil and wrap tightly.
Put foil pack on hot grill. We cooked ours covered for 30 minutes, carefully turning the packet over. Then cooked for another 30 minutes. 
They came out perfectly
*****
Until next time!
May your blessings be many and your troubles be few!


Mason jar candy dispenser


I got this old woodcrafted dispenser from a friend and instantly knew it was going to get a makeover! When I was a little girl, my mom had one of these. I like the dispenser, but I don't like the raw wood. 


*****
 I happened to have some high gloss white paint on hand from another project, and I like the look. I gave the piece a slight sanding, and simply painted it with a small cut-in paint brush.
*****
I hot-glued the outer part of a mason jar lid into the top. This keeps the mason jar steady. 
*****


During a week of having four of our grandchildren with us, our little Miss Bean, and J. Bug were playing with Play-Doh, which is one of Miss Bean's favorite things to do. Miss Bean is just learning to roll the Play-Doh to make little balls. So, I showed J. Bug and Miss Bean what I wanted, and they made my little "gum-balls" for the revamped dispenser. Once the Play-Doh balls were good and dry, I sprayed them with a clear coat sealer. I love the way they look in the dispenser. 
*****
I had this tiny ceramic mouse and I couldn't resist!


*****
Until next time!
May your blessings be many and your troubles be few!

*****

Friday, July 13, 2018

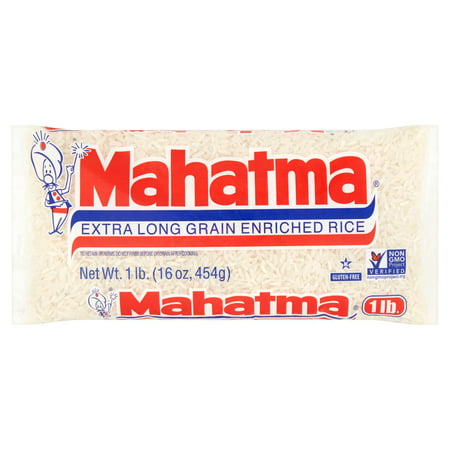
Home-made no-stick rice. No boxed stuff here!


Ingredients
Rice - 1 cup
Butter - 2 Tbsp.
Water - 2 cups


Melt 2 tablespoons butter. 

Before butter gets too hot, pour rice in and stir. We are basically sautéing, or quick frying the rice. 

 On medium/high heat cook rice in butter for approximately two minutes - stirring constantly (don't let it turn brown)


Pour 2 cups hot tap water over rice and let it come to a medium boil.

As soon as the water comes to a boil, turn the heat down to about a number 2 setting (low heat.) Put the lid on. 

Let simmer for approximately 15 minutes. 

I took the lid off and gave it a quick stir after about 10 minutes to show you how it's coming along. It doesn't really need stirred any more than that.

Fifteen minutes of simmering! No need to drain. We like ours al dente and this is perfect!


Mmm. This rice is good enough to eat just like it is...

…but, I'm having my rice this evening with some left over Chicken Mole.


 *****


 *****

Until next time!
May your blessings be many and your troubles be few!

*****

Thursday, July 12, 2018

Chocolate covered peanut butter rounds


 Ingredients
Ritz or Georgia crackers
Peanut butter
Almond Bark

Supplies
Bowl
Fork
Butter knife
Wax paper
Storage container


Directions
Spread peanut butter onto 
crackers,

add cracker tops, set aside.
  
*****

SmartThings Monitor Your Home or Office while away at SmartHome.com Order here!

*****


Break six of the almond bark squares into a glass bowl. 

Microwave for 1 minute on high. Do not overcook. When you take the bark from the microwave, it may appear to still be chunky, but do not put it back in the microwave. First begin to vigorously stir. The hot bark should finish melting the rest. 


*****It is important not to burn the bark!*****

*****
Drop each peanut butter cracker sandwich into melted bark.


 Bring out with fork and lightly tap off excess chocolate bark.


  Put on wax paper to set up until chocolate is firm. 
If you have a little bark left, and no more peanut butter crackers to drop in, you can add any nuts you may have on hand for some chocolate covered nuts or clusters. I did some almonds, and a few peanut clusters.

My chocolate was beginning to harden a bit, so I put it back in the microwave for 15 seconds, stirred in the almonds, and quickly dropped them onto the wax paper. 

 Half the package of dark almond bark (6 squares) made what you see below.

*****
Storing
I layer these in an air tight container using wax paper between each layer so they don't stick to together. Although it doesn't happen at my house, these will keep for about two weeks. In 75 degrees or less, there is no need to refrigerate.


*****
Until next time!
May your blessings be many and your troubles be few!

*****