FOLLOW This Blog!

Wednesday, July 11, 2018

The Rhythm of Woven Dreams by Michelle LaDuke


I should probably know who coined the phrase, "If you have lived then you have a story to tell." I don't; but not to worry myself, I can relish in its profound impact on my very existence. Profound maybe only to me; profound none-the-less.

I have lived. 

I have lived and I have watched others live, which has given me the opportunity to take the photographs held within a little girl's mind, heart, and soul; and draw into the pages of my writing - a panoramic view of her life!
Told in first person narrative, this story interposes and intertwines the realities of a little girl's nightmares with her daydreams and fantasies of hope. Janie wades through the ocean of life's highs and lows searching for her self worth; her place in this world. 

*****

You can order my book on Amazon.

*****
Until next time!
May your blessings be many and your troubles be few!


Friday, July 6, 2018

Chocolate covered pretzel Rods

I am blessed to have a couple of my grandbabies visiting for part of their summer, and our little Jaley Bean has her third birthday coming up. She put in a request for chocolate covered pretzels with sprinkles. So we had some fun making them for her!


*****


 Ingredients:
White Almond Bark
Pretzel sticks of choice
Sprinkles - optional

Supplies:
Glass bowl
Fork
Butter knife
Wax paper

Also optional: cute little 3 year old who needs to see and smell every little thing along the way!

*****


Break almond bark into squares. If using half the package (6 squares) microwave on high for 1 minute. If using all 12 squares, microwave on high for 2 minutes. Some of the bark might still seem hard, but once you begin to stir, it will all melt together.
Stir until creamy.

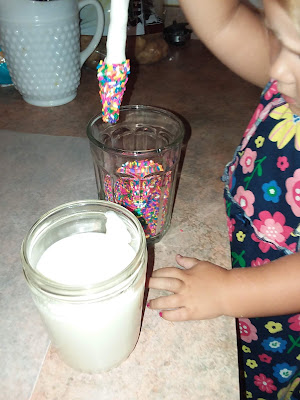
Pour melted bark into tall glass or jar for dipping the pretzels.
I let my Jaley Bean dip the first one. 

We poured our sprinkles into a glass as well thinking we could dip the pretzel into the sprinkles. This didn't work out so well. 


(we kept it anyway because the kids and hubby don't mind how it looks!)

We tried putting the sprinkles in a plate and rolling the pretzel, but that didn't work either, so we sprinkled the sprinkles onto the pretzels before the bark set up.
So Jaley Bean got her chocolate covered pretzels with sprinkles!
Store in airtight container.

 Until next time!
May your blessings be many and your troubles be few!

If you like our content, please follow, join our circle or G+ us!

Wednesday, June 20, 2018

Manila folder lapbook WWII school project


My hubby and I are starting a new chapter in our lives soon, and one of the necessary steps is to down size two homes into one modest sized storage unit. We will be traveling for a while; visiting loved ones, seeing the sites, promoting my book... I am over the moon excited for this next chapter! Downsizing has it's emotional moments, especially when I'm sorting and purging, and come across so much amazing memorabilia. Our children and grandchildren will be receiving boxes and totes full of photos, art work I've saved through the years, school projects I just couldn't throw out...

One of the things I came across that distracted me from my sorting mission is this lapbook project. This was our youngest son's project from history class. If my memory serves me correctly, this was a tenth grade project. The subject was WWII; he was allowed to choose from a list of sub topics, and he chose the Weapons of World War II. The basic lapbook was created at school. I remember when he came home and asked me if I had any extra supplies in my scrapbooking and crafting room. I went like a frenzied momma bear in an attempt to give this boy his supplies! I provided the supplies and he did the work.  He did a massive amount of research, using the internet, old magazines, and pamphlets for the pictures, as well as some old encyclopedias we'd had for years. (The encyclopedias had seen their better days so I was excited to see them get some good use!) 
Jerod has always done very well with his school projects. He sometimes cut it short with time management, but he always had great content, and took pride in what he turned in. He made an A+ on this one, and I decided it deserved to be shared! 
*****
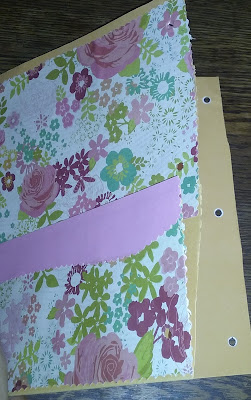
All parts of manila folder were covered with scrapbook paper. 

He used a letter stencil on construction paper for the letters. Good job of cutting those out son!


There were lots of flaps to unfold.


He had to include a pop-up.


Thank you for stopping by! If you like our content, please follow or add us to your circle! And don't forget to +1


Wednesday, June 6, 2018

Summer Outdoor Wedding

Christina and Brendin's Wedding

In July my dearest friend Lisa asked me to style her daughter's wedding which of course I had a blast doing because not only did I get to do what I love doing; I got to do it with Lisa and Christina.

Christina chose "Shades of Blue" as the theme for her wedding. It was an outdoor backyard wedding and the bride and groom wanted to juxtapose semi-formality with backyard/lakeside comfort. Due to budget we went with silk flowers here.
Altogether, the cost for this entire wedding was under $1000.00 (minus the food)

Here are a few of the photos from Christina and Brendin's wedding.


My Bullet-Smash-Junk-Scrap-Loaded-Journal/Planner!

I've been working on a few business ventures lately and found I was having a few too many moments in need of a soft goosfraba whispered into my ears. I take a lot of deep breaths lately because I am bound and determined to be a successful wife, mom, Mawmaw, writer, blogger, business owner...(Whew! a mouth-full to say and to do!) But, I can do it! I know I can! 


I had this old job search organizer, which is 17 years old. I used it back in the days of wife-ing, mom-ing, working on my career, going to college, volunteering... (Whew! Another mouth full!) Anyhow, I was extremely organized back then, and I haven't used this thing in years. Every time I had thought of throwing it out, the hoarding upcycler in me just couldn't do it! 

*****


Each page has a pocket. Great for organization, and for inserting lots of goodies. 


*****


I'll be covering the front, back, and each page with some pretty scrapbook paper. But the front and back had a smooth cover film on them, so I pulled that off.


I took the spiral ring off the book to make it easier to work with.


To add durability, and flexibility in my possible decorative direction, I painted the edges with some pretty matte pink paint.

I gathered a bunch of leftover scrapbooking papers and supplies.


I traced the back of my scrapbook paper for size, and cut it out.


Glued the paper on with glue sticks, (I had dozens left over from some previous projects with my grandchildren.)

*****
I glued scrapbook paper, cutouts, and embellishments onto each page.

*****

I had taken the pocket pages from an old spiral notebook bound for the trash, and I covered those as well. I will be adding these with some sort of string or ribbon.


*****

I created some bullet journal pages that would suit my needs. These are just a few of them. I also have one for my Ebay listings, my blogging, meal planning...


The clear pages were part of the original organizer, I will use the one for business cards, and will probably use the large one for pens and markers. 

I added some clear pockets for keepsakes. (Another yard sale find)


*****
I will be adding more memorabilia, photos, and journaling tidbits as I go, but I really like where it's going so far!


*****
I have saved nearly every card I have ever received, and I took some of the more special ones to use in my book. I cut them up to use parts and pieces. They serve as both, special reminders and as decorative accent! I love it!


I created pockets using parts from the cards. 


*****
More parts from the cards. I am creating tabs with some of them that coordinate. I am really enjoying this process; very therapeutic as well as constructive!


*****

I am a huge fan of yard sales, and I found these little plastic page saver sleeves for a dime. There were 8 in the package, and I had a few left from (of course) another project. I slid some card stock down into the sleeves, and punched holes in the card stock to match up with the holes in the plastic sleeves. I will add these in with some ribbon.

*****

I like the last page as is, so I won't be covering it with scrapbook paper. I'm sure I will embellish the heck out of it though! 


*****

The front so far - I haven't added my closure yet. I'm still trying to figure out what I want to use. I've been searching my craft room for the solution because I'm standing strong in my self-challenge to use up my left-overs on this project!
 

 The back so far.

So, this is what I have so far folks! I love every bit of where this is going. I love the perfect imperfections in using the old book with tatters and tears. I will continue to juxtapose the old and the new to create my book of organization and memory keeping!
 I am excited to use this
 bullet-smash-junk-scrap-loaded-journal!

*****
Until next time! 
May your blessings be many and your troubles be few!